
Short answer: on a Mac, open the HEIC photo in Preview, choose File > Export…, set Format to JPEG and click Save. If the photos are in your Photos library, use File > Export in Photos instead. To convert a batch of up to 50 HEIC files in your browser and download them as one ZIP, use our HEIC to JPG tool.
Before you start
You need the HEIC photos, either as files in Finder (from AirDrop, email, a USB import or a download) or in your Photos library. Preview, Photos and Finder are built into macOS, so there is nothing to install. We tested the Preview, Photos and browser steps on macOS 27.0.1 on a 16-inch MacBook Pro with M4 Pro, on 18 October 2026.
Keep your original HEIC files until you have checked the JPGs. Apple says HEIC stores photos with better compression than JPEG at the same visual quality, so expect the JPG copies to take up more space.
Method 1: Convert HEIC to JPG with Preview
Preview is the simplest built-in option for photos that are already files in Finder.
1. Double-click the HEIC file to open it in Preview. If another app opens, Control-click the file and choose Open With > Preview.
2. Choose File > Export…, which opens the export dialog.
3. Click the Format pop-up menu and choose JPEG.
4. Drag the Quality slider if you want a smaller file or more detail.
5. Choose where to save the JPG, then click Save.
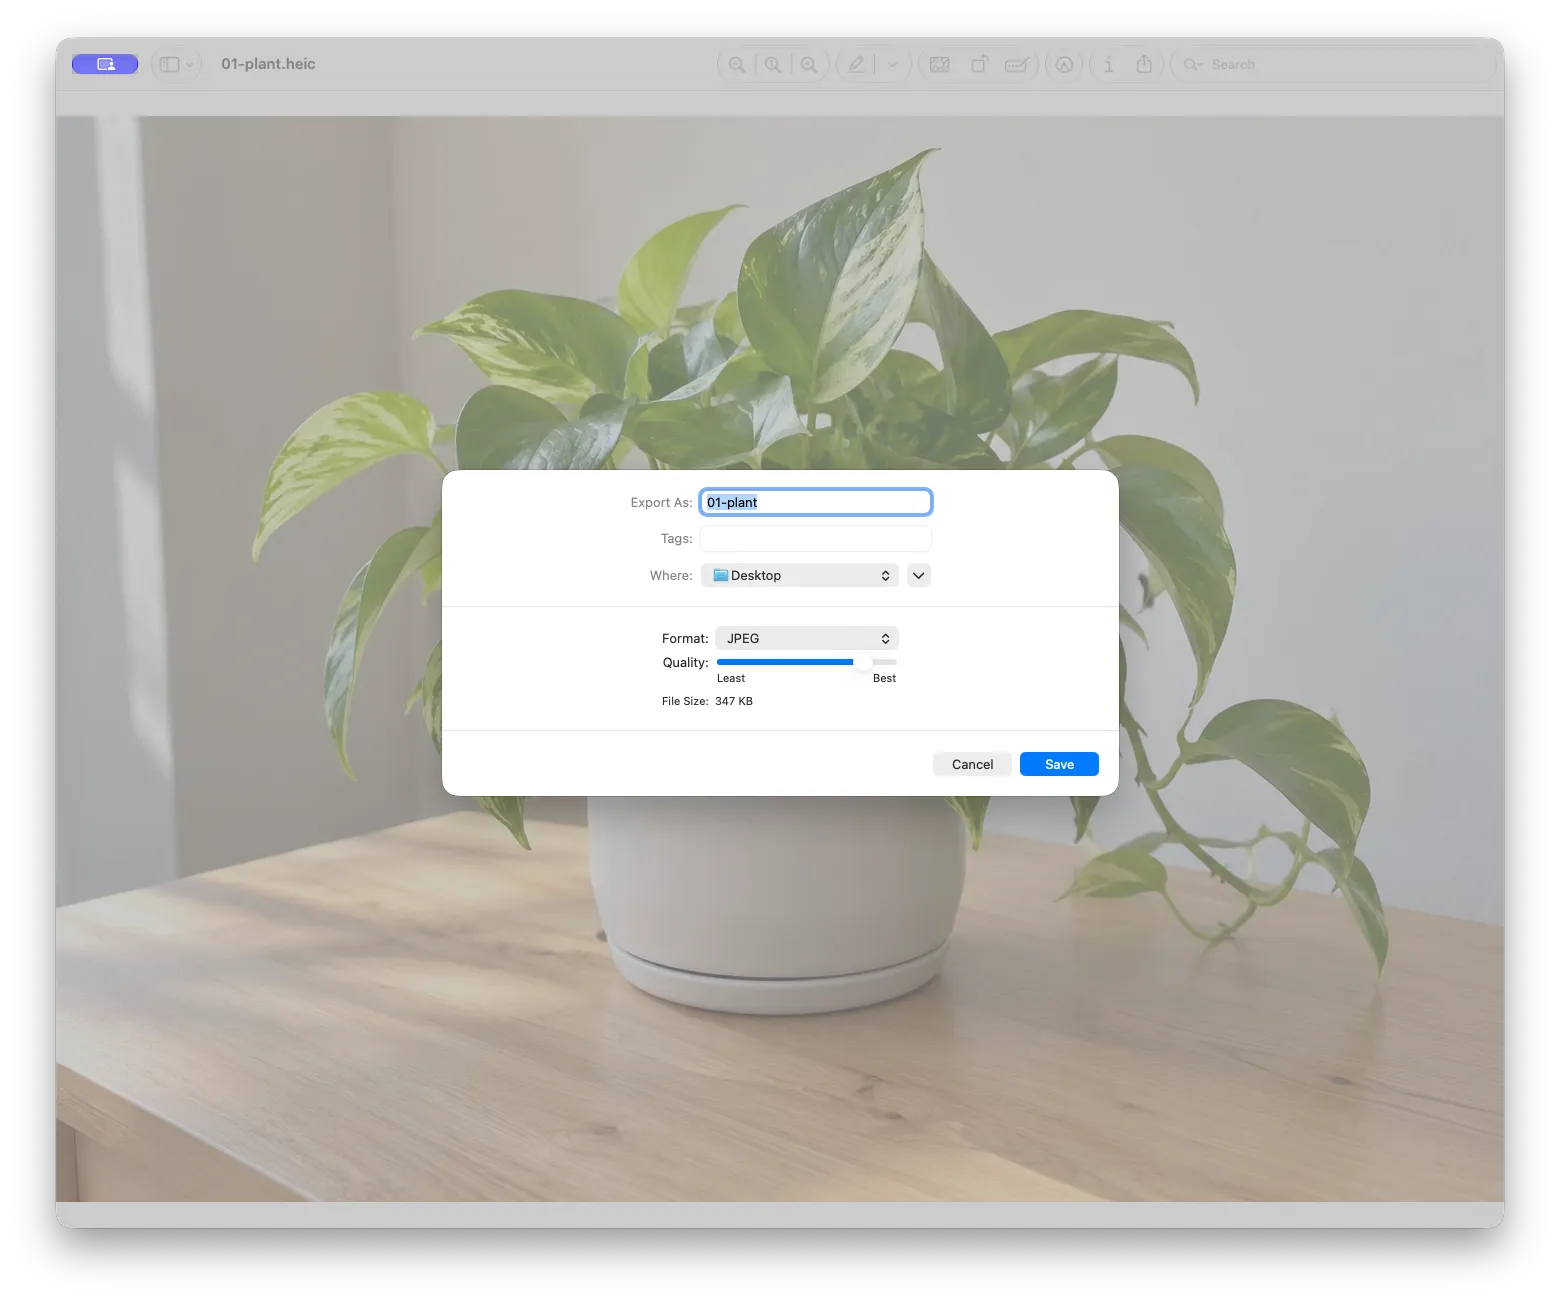
Convert several HEIC files at once in Preview
Preview can also do a batch. Select the HEIC files in Finder and open them together, so they appear in one Preview window. Show the sidebar thumbnails, click one thumbnail and press Command-A to select them all. Then choose File > Export Selected Images…, click Options, choose JPEG and click Choose. Apple's guide to converting image file types in Preview covers the same steps.
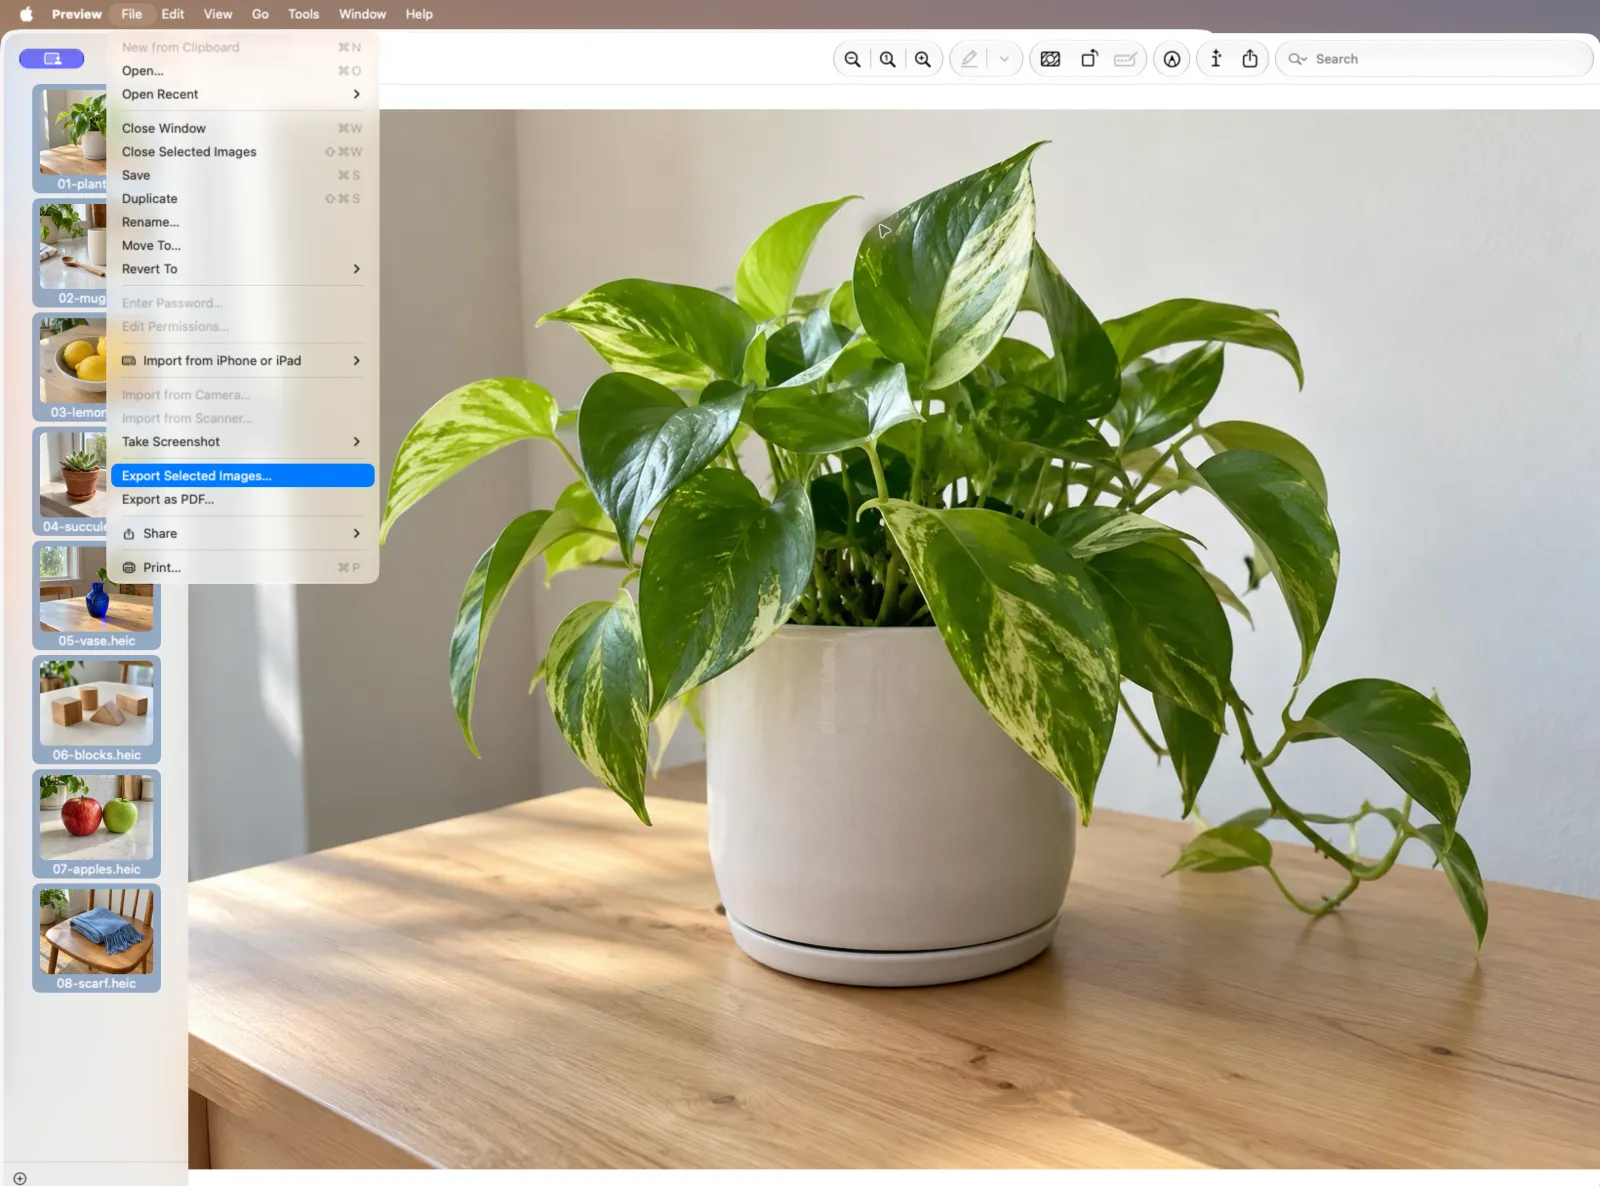
Pros: built in, works offline and keeps everything in Apple apps. You also get a quality slider.
Cons: the batch steps are easy to miss, and you have to select the thumbnails first.
Method 2: Export HEIC photos as JPG from the Photos app
Use Photos when the pictures are in your Photos library, for example from iCloud Photos, rather than as files in a folder.
1. Open Photos and select the photos you want. Command-click to select more than one.
2. Choose File > Export > Export [number] Photos, for example Export 8 Photos.
3. Click the Photo Kind pop-up menu and choose JPEG.
4. Open the options next to Photo Kind to set JPEG Quality and Size if you need to.
5. Click Export, choose a folder, then click Export again.
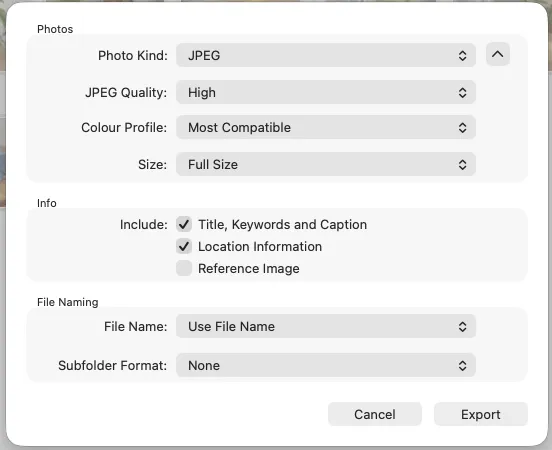
Photos exports the edited version of each photo. File > Export > Export Unmodified Original keeps the original HEIC instead, so don't use that one if you need JPGs. Apple's guide to exporting from Photos on Mac lists every option.
Pros: the best route for photos in your library. You control quality, size and file names in one dialog.
Cons: it only works on photos in Photos. For loose files, Preview or Finder is more direct.
Tip: stop your iPhone saving new photos as HEIC
On your iPhone, open Settings > Camera > Formats and choose Most Compatible. New photos are then saved as JPEG. The setting doesn't change photos you've already taken. If you import over a USB cable, Settings > Apps > Photos (Settings > Photos on older versions of iOS) has a Transfer to Mac or PC option. Automatic can convert photos to a compatible format during the import. See Apple's page on using HEIF or HEVC media on Apple devices.
Method 3: Batch convert HEIC to JPG in your browser
Our HEIC to JPG tool suits a folder of HEIC files, or a Mac or PC where you can't use the built-in apps the way you'd like.
1. Open HEIC to JPG in Safari, Chrome or Firefox.
2. Drag your HEIC files onto the page, or click Choose HEICs or drop them here. You can add up to 50 photos per batch, up to 100 MB each.
3. Leave JPG quality at the default 92%, or move the slider between 60% and 100%. One setting applies to the whole batch.
4. Click Convert to JPG. Photos convert one after another, and the status line shows progress.
5. Check the previews, then click Download all as ZIP to save every JPG in one file, heic-to-jpg.zip. Each photo also has its own Download button.
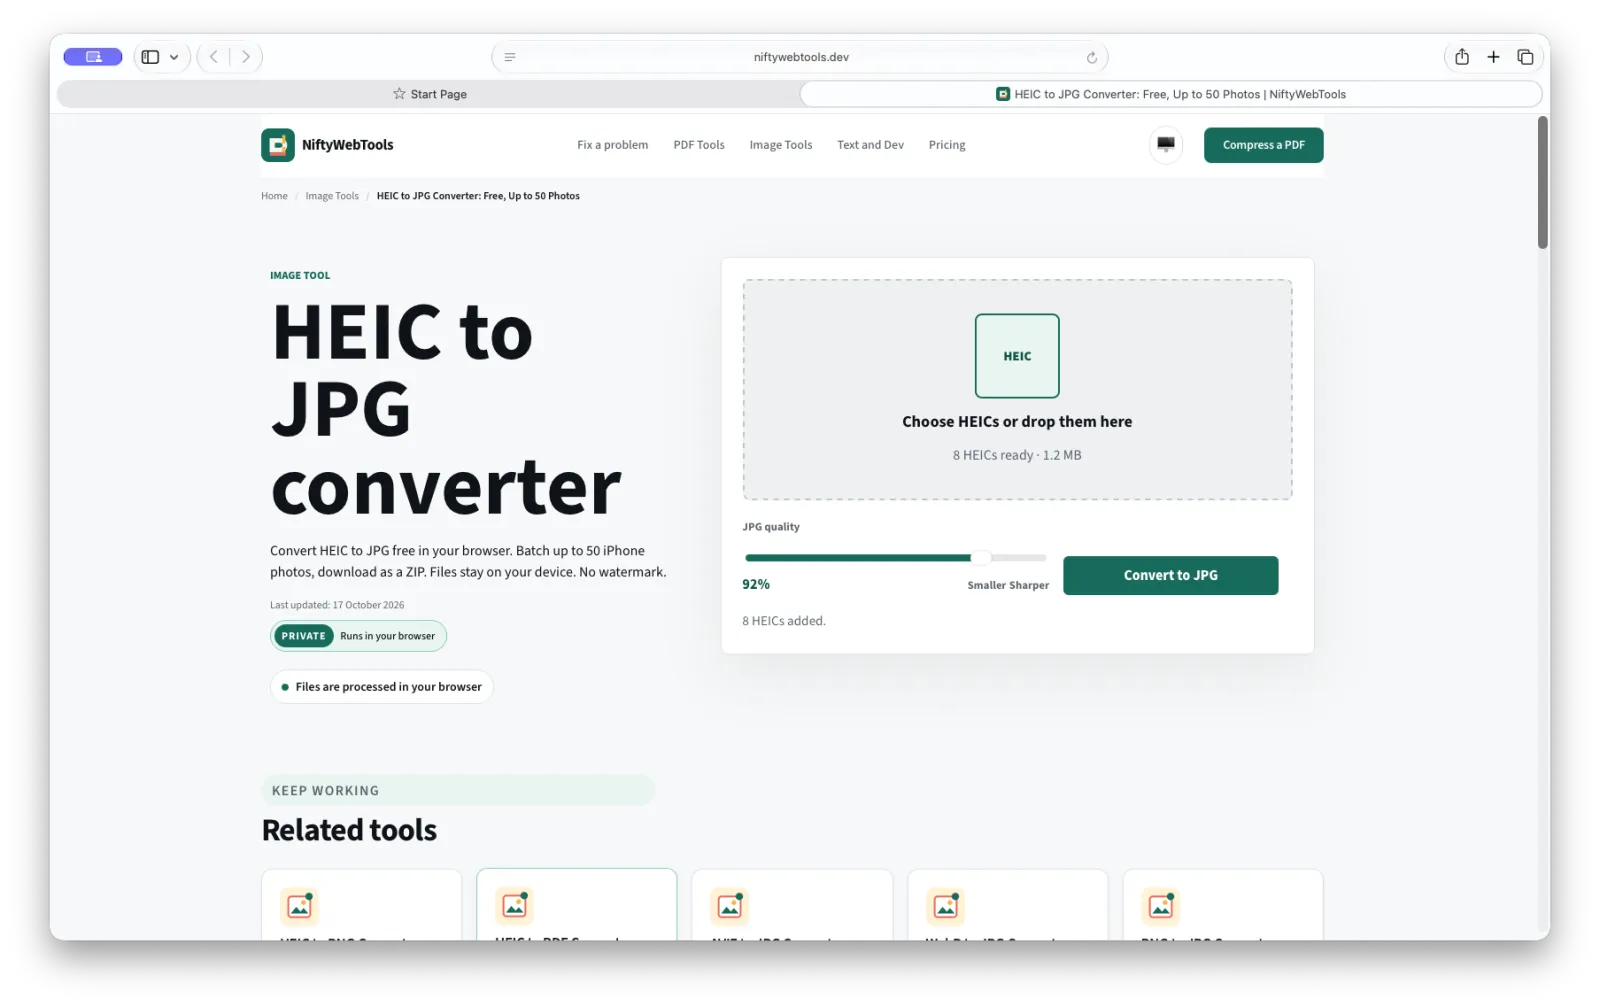
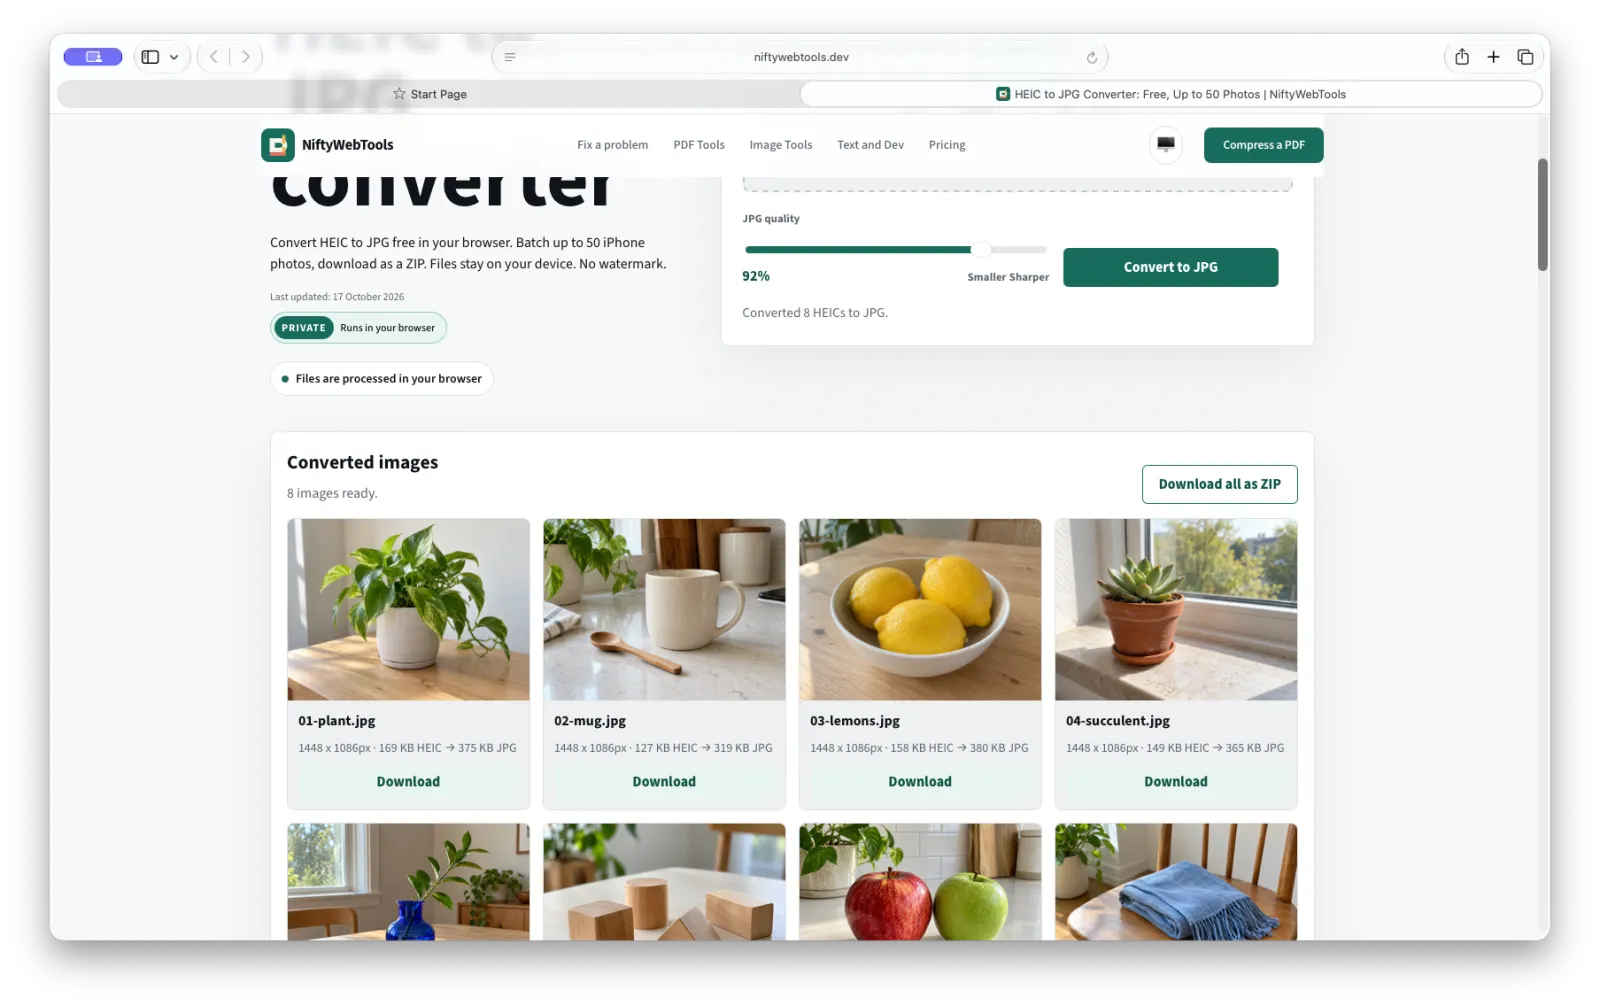
Conversion runs in your browser tab on this tool, so your photos and the JPGs stay on your device. When you first add photos, the page loads its HEIC decoder from our site. That request contains no photo data, but you do need a connection.
Pros: converts up to 50 photos per batch with one quality setting, previews every result and saves one ZIP. It works the same on a Mac, a Windows PC or a Chromebook, with no sign-up.
Cons: it needs an internet connection to load the decoder, and large batches take longer, depending on your Mac. In our tests the JPGs didn't keep the GPS location or other camera details. For photos in your Photos library, exporting from Photos is simpler.
Which method should you use?
| Situation | Best choice | Why |
|---|---|---|
| One or a few HEIC files in Finder | Preview | Built in, works offline, quality slider |
| Photos in your Photos library | Photos app | Exports straight from the library with JPEG quality and size options |
| A folder of HEIC files to send or upload | NiftyWebTools HEIC to JPG | Up to 50 per batch, previews, one ZIP download |
| You're offline | Preview or Photos | Our tool needs a connection to load its decoder |
| You need to keep location data | Photos app, with Location Information ticked (check the JPG afterwards) | In our tests, our tool didn't keep it |
Preview is the better choice when you're offline, when you only have a few files, or when you'd rather stay in Apple's own apps. Finder's Quick Actions > Convert Image is another built-in option for a selection of files. See Apple's guide to quick actions in the Finder.
Common problems
- Preview only exported one photo. Select every thumbnail in the sidebar. Then choose Export Selected Images… from the File menu.
- Photos saved HEIC files, not JPGs. You probably used Export Unmodified Original. Use File > Export > Export [number] Photos instead (Export 8 Photos for eight), then set Photo Kind to JPEG.
- Our tool says some files were ignored. They aren't HEIC files, or they're already JPGs. Files over 100 MB are skipped. You can add up to 50 photos per batch, so run another batch for the rest.
- "Could not load the HEIC decoder". Check your connection, reload the page and add the photos again.
- A form still rejects the JPG because it's too large. Make it smaller with Compress Images, or see more answers on Fix it.
Related tools
- HEIC to JPG: batch up to 50 photos and download a ZIP.
- HEIC to PNG: for screenshots and graphics with sharp edges.
- HEIC to PDF: turn iPhone photos into one PDF.
- Convert Image Files: convert between JPG, PNG, WebP and more.
 HEIC to JPG Converter